
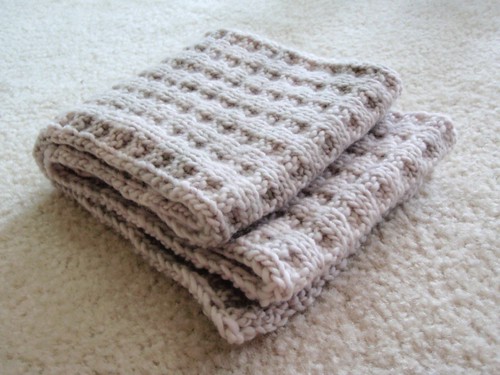
I loooove this scarf. It is so incredibly soft and comfy, plus long enough to wrap around my neck and wide enough cover my nose to keep out the cold. The pattern is a simple waffle stitch which I've written up below for your enjoyment. But first, outtakes from the finished-object photo shoot:
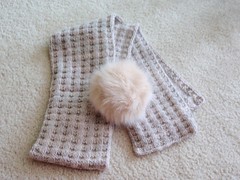
Oh look, a Tribble!

Um, hmmm.
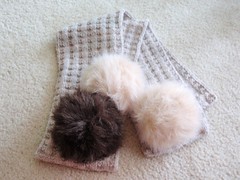
I think I'm in trouble.
Yarn: Malabrigo Merino Worsted or another worsted-weight yarn of your choice. I used approximately 1.5 skeins.
Needles: size 8US, or a size to obtain a gauge you like with your yarn
Gauge: not very important, as long as you like the fabric made with your yarn and needle choice
Finished Size: my scarf is approximately 7.5 inches wide and 65 inches long after a gentle steam blocking.
Cast on 30 stitches
Row 1: knit across
Row 2: purl across
Row 3: (k2,p2) across; end k2
Row 4: (p2, k2) across; end p2
Repeat until scarf is desired length and bind off.
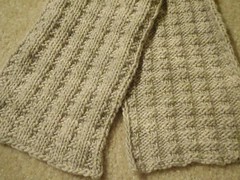
Below, you can see that both sides of the scarf form a nice pattern. The front side is on the left, and the reverse on the left.
I'd love to see a photo if you make one.
Updated Jan 2010:
I neglected to mention in the original pattern how to minimize the curling of this scarf after knitting.
Blocking is the key here. I’ll explain my favorite way of blocking below, but your preferred method should work just as well.
To block, I use the “steam shot” button on my iron. Find a long heat and water resistant surface, like your bathroom floor covered in towels. Lay the scarf out and flatten as much as possible by hand. If you like, pin the edges out flat. Pass the iron slowing over the surface, hitting the steam shot button repeatedly as you go. Do not touch the iron directly to the scarf. I typically don’t pin the scarf down, but use my hand to flatten and smooth as I go. Be careful not to pull it so straight that you lose the waffle texture.
Allow the scarf to dry and cool before moving.
While it is impossible to completely prevent curling, this tames the curl to a manageable (and for me, comfortable) level while wearing.
11 comments:
Thanks for sharing!
This looks like a great project for a beginner like me.
Hi I was wondering if this pattern shows on both sides of the scarf or just one side?
My mom wants me to make her a scarf and when it is flipped around her neck she wants to see the pattern on both sides so I need a pattern that does not have a "wrong" side.
Thanks if you can help.
Sandy P
It looks so comfy! thank you for posting it.
I've added a photo of the reverse side of the scarf. While is it not identical to the front, I think it is nice looking as well.
Love the pattern!! I had to knit a scarf in it right away!!
I love the scarf!!
Very Nice Scarf.. Thanks for The Pattern.. I am casting on one for My Daughter tonight
Hi, I'm knitting this now and the edges are really curling on me. It doesn't look curled in the picture. Did anyone have this problem and how did you fix it?
Thanks!
Ditto on the problem with curling. I'm ready to tear mine out and start over with a new pattern! Any suggestions?
For some reason my scarf just seems to have turned out wrong. I did K2, P2 all the way across and the P2, K2 on the next row all the way across. I didn't come out with a waffle pattern.
I made a cowl out of this pattern--it was WONDERFUL! I gave it to my niece as a Christmas gift, and she loved it. Thanks!
Post a Comment